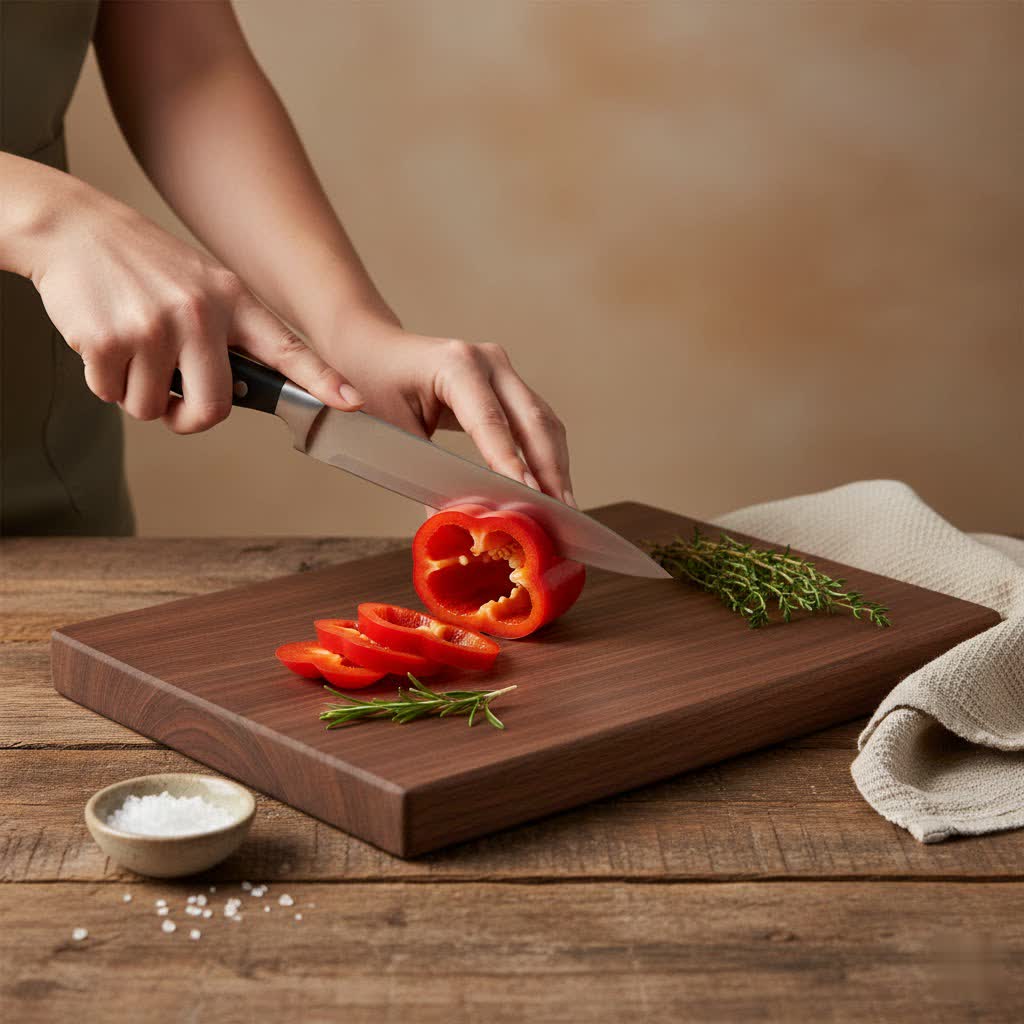
Few kitchen tools offer the timeless beauty and functionality of a wooden cutting board. It’s a workhorse, a centerpiece, and often, a cherished heirloom. However, over time, even the most robust wooden boards can lose their luster, becoming dried out, dull, and even developing an unappealing grey hue. This isn’t just an aesthetic issue; a neglected board can become rough, prone to cracking, and less hygienic. If your beloved wooden cutting board has seen better days, don’t despair! Restoring it to its former glory is a rewarding process that extends its life and brings back its natural warmth.
Understanding Why Your Wooden Cutting Board Turns Dry and Grey
Before diving into restoration, it’s helpful to know what causes this common deterioration. Wood is a natural material that breathes and reacts to its environment. When a cutting board turns dry and grey, it’s typically a sign of moisture imbalance and a lack of proper conditioning.
The primary culprit for dryness is a loss of natural oils, often exacerbated by frequent washing without replenishment. Hot water and harsh detergents can strip away these essential oils, leaving the wood brittle and susceptible to damage. This dryness can also lead to “raised grain,” where the wood fibers stand up, making the surface feel rough.
The grey discoloration can stem from several factors. It might be superficial mineral staining from hard water, or it could indicate the presence of mold or mildew, especially if the board is left damp for prolonged periods. In some cases, a chemical reaction between the tannins in certain woods (like oak) and iron particles from knives can create dark, greyish-black spots. Infrequently, certain wood types may have inherent mineral discolorations that become more prominent as the wood ages and dries. Understanding the root cause will help you choose the most effective restoration steps.
The Essential Tools and Materials for Restoration
To bring your cutting board back to life, you’ll need a few common household items and some specialized wood care products. Gather these before you begin:
- Cleaning: Mild dish soap, warm water, scrub brush, white vinegar, baking soda, hydrogen peroxide (optional, for stubborn stains).
- Sanding (if needed): Assorted grit sandpaper (coarse, medium, fine – e.g., 80, 120, 220, 400 grit), sanding block or orbital sander, clean damp cloths, tack cloth.
- Conditioning: Food-grade mineral oil (USP grade), wood butter or board wax (beeswax/mineral oil blend), soft cloths or paper towels.
- Optional: Lemon halves, salt (for mild cleaning/deodorizing).
Having everything at hand will make the restoration process smoother and more efficient, allowing you to focus on the transformation of your wooden cutting board.
Step-by-Step Guide to Restoring Your Dried Out Grey Cutting Board
Restoring a dried out, grey cutting board involves a series of steps, from deep cleaning to nourishing and protecting the wood. Follow these instructions to rejuvenate your board.
Step 1: Deep Cleaning and Sanitization
Begin by giving your board a thorough cleaning.
- Basic Wash: Wash the board with warm water and a small amount of mild dish soap. Use a scrub brush to remove any food particles and surface grime. Rinse thoroughly.
- Addressing Stains and Odors:
- For general stains and odors, sprinkle coarse salt over the board, then rub it with half a lemon. Let it sit for 10-15 minutes before scraping off the mixture and rinsing.
- For deeper stains and sanitization, a hydrogen peroxide soak can be effective. Place the board in a sink and cover it with hydrogen peroxide. Let it fizz until it stops, then scrub and rinse. You might need to repeat this several times. Alternatively, a diluted bleach solution (2 tablespoons per gallon of water) can be used for sanitizing.
- To brighten a grey board or remove discoloration caused by certain cleaning agents (like baking soda and lemon), a white vinegar solution can be very effective. Mix a 4:1 ratio of water to white vinegar, cover the board, let it sit for about 5 minutes, then wipe dry.
- Thorough Drying: After cleaning, rinse the board completely and wipe it dry with a clean towel. Stand it upright to air dry for at least 24 hours, ensuring all moisture has evaporated before moving to the next step.
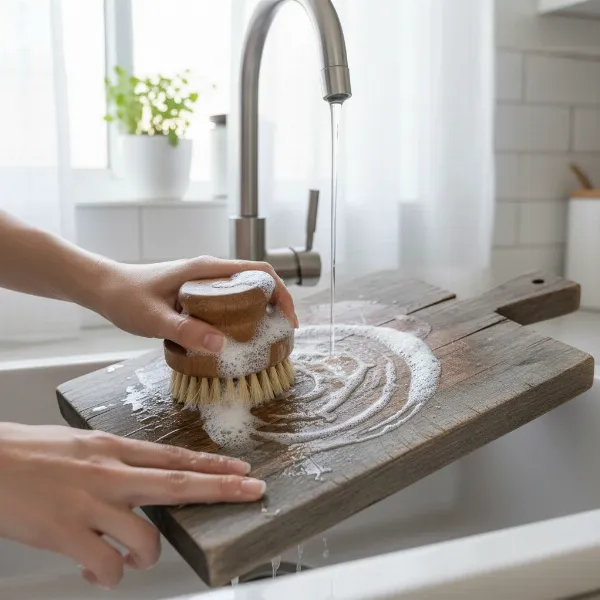 A person scrubbing a grey wooden cutting board with a brush and soap, emphasizing deep cleaning before restoration
Step 2: Sanding Away Imperfections
Sanding is crucial for removing deep knife marks, rough patches, raised grain, and stubborn discoloration that cleaning alone couldn’t fix.
- Initial Sanding: Start with a coarser grit sandpaper (e.g., 80 or 120 grit) if your board has deep gouges or significant rough spots. Sand evenly with the grain of the wood. This is important to prevent cross-grain scratches that are difficult to remove.
- Progressive Sanding: Once the deep imperfections are gone, move to a finer grit (e.g., 180 or 220 grit). Continue sanding with the grain until the board feels smoother. For an extra-smooth finish, you can progress to even finer grits like 320 or 400. The goal is to create a consistently smooth surface.
- Water Popping (Optional but Recommended): After your final sanding step, lightly spray the board with water and let it air dry for about 20-30 minutes. This will cause any remaining wood fibers to stand up. Once dry, give the board one last light sanding with your finest grit sandpaper (e.g., 220 or 400) to knock down these fibers, resulting in an even smoother finish.
- Dust Removal: Thoroughly wipe down the board with a damp cloth to remove all sawdust. A tack cloth can be particularly effective for picking up fine dust particles. Ensure the board is completely clean and dry before oiling.
Step 3: Rehydrating and Protecting with Oil and Wax
This is the most critical step for bringing back the wood’s natural color and protecting it from future drying and greying.
- Apply Mineral Oil: Liberally apply food-grade mineral oil (USP grade) to all surfaces of the board—top, bottom, and sides. Don’t be shy; the wood will soak up a lot, especially if it’s been very dry. You can use a clean cloth or even your hands to rub it in.
- Allow to Soak: Let the oil penetrate the wood for several hours, ideally overnight. For severely dried-out boards, you might see the wood “drink up” the oil quickly; in this case, apply more oil after a few hours and let it soak again. The goal is for the wood to feel saturated.
- Wipe Excess: After the soaking period, wipe off any excess oil with a clean, dry cloth. The board should feel smooth and conditioned, not greasy.
- Apply Board Wax/Conditioner (Optional but Recommended): For an extra layer of protection and a beautiful sheen, apply a food-grade board wax or wood conditioner (typically a blend of mineral oil and beeswax). Rub it generously into the wood, let it sit for a few hours or overnight, then buff off the excess with a clean towel until you achieve a nice, smooth finish. This wax layer helps seal in the oil and repel moisture.
> “The secret to a long-lasting wooden cutting board isn’t just regular cleaning, it’s consistent conditioning. Think of oiling as moisturizing your skin – essential for preventing dryness and maintaining elasticity.” – Chef Elena Rodriguez, Culinary Arts Instructor
Maintaining Your Restored Wooden Cutting Board
Once your wooden cutting board is beautifully restored, consistent care is key to keeping it that way. Regular maintenance will prevent future drying, greying, and potential damage.
Proper Cleaning Habits
- Hand Wash Only: Never put your wooden cutting board in a dishwasher. The high heat and prolonged exposure to water can cause warping, cracking, and severe drying.
- Mild Soap and Warm Water: After each use, wash your board promptly with warm water and a mild dish soap. Use a sponge or scrub brush to clean the surface.
- Rinse and Dry Immediately: Rinse all soap residue and immediately wipe the board dry with a clean towel. Do not let it air dry flat, as this can lead to uneven drying and warping.
- Store Upright: Store your board standing on its edge or in a well-ventilated area to allow air circulation on all sides, ensuring it dries completely and evenly.
Regular Conditioning
- Frequency: The frequency of oiling depends on how often you use and wash your board. As a general rule, condition your board once a month, or whenever it starts to look dry, dull, or feels rough.
- Listen to Your Board: If water no longer beads on the surface or if the wood appears lighter and faded, it’s time for another application of mineral oil and/or board wax.
- Apply Evenly: When conditioning, ensure you apply oil to all sides of the board, not just the top. This helps maintain an even moisture balance, which prevents warping.
Best Practices for Longevity
- Use Separate Boards: Consider having separate cutting boards for raw meats and cooked foods/produce to prevent cross-contamination.
- Rotate Use: If you have multiple boards, rotate their use to give them time to fully dry and rest between uses.
- Avoid Harsh Chemicals: Steer clear of abrasive cleaners, scouring pads, and harsh chemical disinfectants, as these can strip the wood and cause damage.
- Don’t Submerge: Never soak your wooden cutting board in water for extended periods. This can cause the wood to swell, crack, and harbor bacteria.
- Gentle Chopping: While wooden boards are durable, excessive force when chopping or using serrated knives aggressively can create deeper gouges that require more frequent sanding.
By incorporating these simple maintenance steps into your routine, your restored wooden cutting board will remain a beautiful, functional, and hygienic part of your kitchen for years to come. It’s an investment in your culinary tools that pays dividends in both aesthetics and practicality.
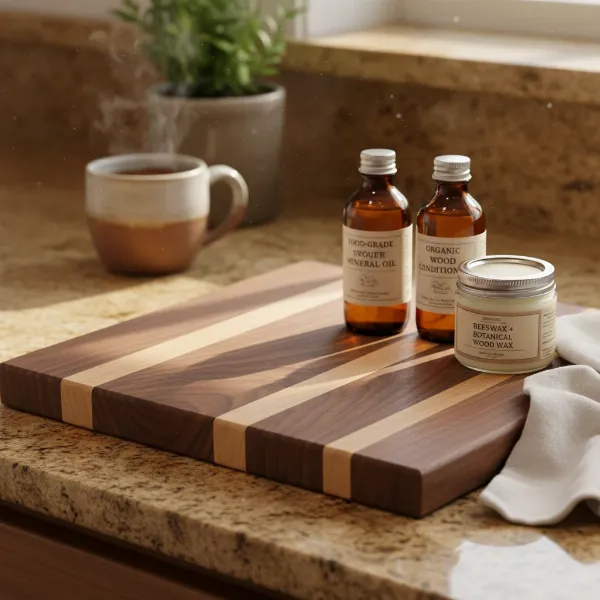 A well-maintained wooden cutting board with oil and wax products, highlighting the importance of regular conditioning
FAQs About Wooden Cutting Board Restoration
Can I use cooking oils like olive oil or vegetable oil to condition my cutting board?
No, it is strongly advised against using cooking oils like olive, vegetable, or canola oil to condition your wooden cutting board. These oils can go rancid over time, leading to unpleasant odors and a sticky, off-putting residue on your board. Always use food-grade mineral oil or a specialized cutting board conditioner made with mineral oil and beeswax, which are stable and won’t spoil.
How often should I sand my wooden cutting board?
Sanding is not a routine maintenance step; it’s typically reserved for when your board has significant knife marks, deep scratches, uneven surfaces, or stubborn stains that cannot be removed by cleaning alone. For general maintenance, focus on regular cleaning and oiling. If you do sand, aim to do it only when necessary, perhaps once or twice a year for heavily used boards, or less frequently for those with lighter use.
My cutting board is warped. Can sanding fix it?
Sanding can help correct minor warping or unevenness by removing material from the higher areas. However, for severely warped boards, sanding might not be enough to completely flatten the board without removing too much wood. Warping is often caused by uneven moisture exposure (like only oiling one side or leaving it wet) and is best prevented through proper drying and consistent conditioning on all surfaces.
Is it normal for a new wooden cutting board to feel rough after the first few washes?
Yes, it is quite normal for new wooden cutting boards to feel slightly rough or “raise their grain” after the first few washes. This happens as water causes the wood fibers to swell and stand up. A light sanding with fine-grit sandpaper (e.g., 220 or 400 grit) followed by thorough oiling will usually resolve this, and the issue typically becomes less severe with subsequent uses and conditioning.
What’s the difference between mineral oil and board wax/conditioner?
Mineral oil penetrates deep into the wood fibers, hydrating them from within and preventing drying and cracking. It’s the primary nourishment for your board. Board wax or conditioner, often a blend of mineral oil and beeswax (or other food-safe waxes), provides an additional protective layer on the surface. This wax layer helps seal in the oil, repels moisture, and gives the board a lustrous finish, enhancing its durability and appearance.
How long does a properly restored wooden cutting board last?
With proper restoration and ongoing diligent care, a high-quality Wooden Cutting Board can last for decades, even a lifetime. The key is consistent cleaning, regular oiling, and addressing any issues like dryness or stains promptly. Think of it as an investment that, with a little attention, will continue to serve your kitchen for many years.