Wood brings warmth, character, and timeless elegance to any home, gracing our floors, furniture, and cabinetry with its natural beauty. However, despite its enduring appeal, wood is susceptible to unsightly stains that can mar its perfect finish. Whether it’s a forgotten water glass, an accidental ink spill, or stubborn grease, a stain can feel like a disaster. But don’t despair! With the right knowledge and a few clever techniques, you can effectively tackle most wood stains and restore your beloved wooden pieces to their former glory. This comprehensive cleaning guide will equip you with the expertise to identify, treat, and prevent common wood blemishes, ensuring your wooden surfaces remain pristine for years to come.
Understanding Wood Stains: Types and Causes
Before you dive into stain removal, it’s crucial to understand the type of stain you’re dealing with. Different stains require different approaches, and an incorrect method could potentially worsen the damage. Wood stains generally fall into several categories, each with its own common culprits.
Common Types of Wood Stains:
- White Water Rings (Moisture Stains): These appear as milky white marks, typically caused by moisture trapped under the wood’s finish. Hot cups, condensation from cold glasses, or wet spills left for too long can all lead to these frustrating rings.
- Dark Water Stains: If moisture penetrates beyond the finish and into the wood itself, it can cause dark, often black, spots. This indicates more significant water damage, potentially leading to mold or mildew beneath the surface.
- Heat Stains: Resembling white water rings but often larger and more opaque, heat stains are caused by hot objects placed directly on wood without protection. The heat can disrupt the wood finish, creating a hazy or scorched appearance.
- Grease and Oil Stains: Kitchen environments are prone to grease splatters and oil spills. These stains seep into the wood, leaving a darkened, often sticky residue that can be challenging to lift.
- Ink and Marker Stains: Accidental marks from pens or markers can quickly absorb into wood, leaving behind vibrant, often difficult-to-remove, colors.
- Food and Beverage Stains: Red wine, coffee, tomato sauce, and other common kitchen spills can leave noticeable discoloration if not cleaned promptly.
- Chemical Stains: Exposure to harsh cleaning products, nail polish remover, or other chemicals can strip the finish or even discolor the wood itself, creating discolored patches.
Identifying the specific type of stain will guide you toward the most effective removal strategy, ensuring a safer and more successful restoration process.
Essential Tools and Materials for Wood Stain Removal
You don’t always need a professional arsenal to tackle wood stains. Many effective solutions can be found right in your home. However, for more stubborn issues, specialized products might be necessary.
Common Household Items:
- Soft cloths or microfiber towels: Essential for cleaning, applying solutions, and buffing.
- Baking soda: A mild abrasive, excellent for pastes.
- White vinegar: An acidic cleaner, effective against many types of stains.
- Non-gel toothpaste: Its mild abrasive qualities can help lift surface stains.
- Petroleum jelly: Can help draw out moisture from white rings.
- Mayonnaise: Surprisingly effective for some water and heat stains due to its oil content.
- Table salt: Forms a gentle abrasive paste when mixed with water.
- Mild dish soap: Good for general cleaning and tackling grease.
- Iron: For heat stains (use without steam).
- Hairdryer: On a low setting, for drying or gently warming.
Specialized Products (for tougher stains):
- Wood stain stripper: Chemical solutions designed to remove existing finishes and deeply absorbed stains.
- Wood bleach (oxalic acid or two-part wood bleach): Used for lightening severe dark stains or restoring wood’s natural color.
- Fine-grit sandpaper (100-220 grit): For gentle sanding after chemical treatment or for surface imperfections.
- Mineral spirits or paint thinner: For cleaning up residue from oil-based stains or strippers.
- Mineral oil or furniture polish: For conditioning and protecting wood after cleaning.
- Plastic scraper or putty knife: For carefully removing loosened stain or stripper.
- Rubber gloves, safety glasses, and respirator: Essential personal protective equipment (PPE) when working with chemical strippers or strong bleaches.
- Small, soft-bristled brush or old toothbrush: For scrubbing intricate areas or applying pastes.
Always gather your materials before you begin, and ensure you have proper ventilation, especially when using chemical products.
Step-by-Step Guide to Removing Common Wood Stains
Always begin by testing any removal method on an inconspicuous area of your wood furniture or flooring. This ensures the solution won’t cause discoloration or damage to the finish.
Removing White Water Rings and Moisture Stains
|
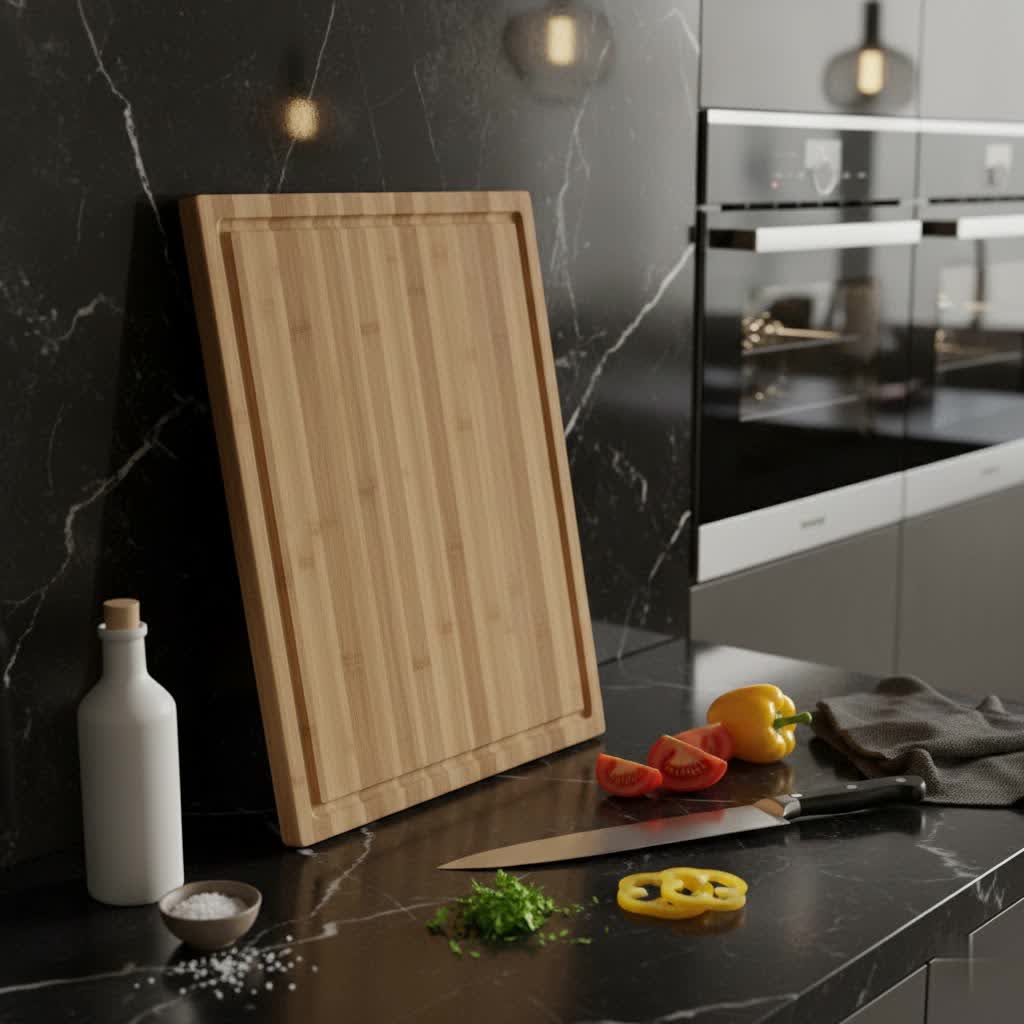
Our Picks for the Best Wooden cutting board in 2026
As an Amazon Associate I earn from qualifying purchases.
|
||
| Num | Product | Action |
|---|---|---|
| 1 | Allsum Bamboo Wood Cutting Board for Kitchen, 1" Thick Butcher Block, Cheese Charcuterie Board, with Side Handles and Juice Grooves, 16x11" |

|
| 2 | Freshware Bamboo Cutting Board Set of 3, Wooden Cutting Boards for Kitchen, Knife Friendly Food Grade Chopping Board, Lightweight with Hanging Hole for Easy Storage |
|
| 3 | Astercook Deep-Carbonized Bamboo Cutting Boards for Kitchen with Wood Storage Stand, Reversible Charcuterie & Chopping Boards with Juice Grooves and Easy-Grip Handles, Knife-Friendly, Kitchen Gift |
|
| 4 | Greener Chef Luxury XL Bamboo Cutting Board Set of 3 with Vertical Grain Strength Technology - Extra Large Wood Cutting Boards for Kitchen and Lightweight Chopping Board Set - Replacements for Life |
|
| 5 | Kikcoin 17”×11” Bamboo Cutting Boards for Kitchen, Healthy Wooden Cutting Boards for Kitchen, Charcuterie, Vegetables, Cheese, Extra Large Chopping Boards with Deep Juice Groove and Handle, Natural |
|
| 6 | Bamboo Cutting Board for Kitchen, 18" Large Wood Charcuterie Cheese Board, Wooden Chopping Block with Side Handles and Juice Grooves |
|
| 7 | Premium Cutting Board Set – Non-Toxic Carbonized Bamboo & Wooden Cutting Boards for Kitchen Meal Prep, Durable Butcher Block for Meat with Side Handles, Juice Groove, Charcuterie & Chopping (3 Pcs) |
|
| 8 | Extra Large Cutting Board, 17.6" Bamboo Cutting Boards for Kitchen with Juice Groove and Handles Kitchen Chopping Board for Meat Cheese board Heavy Duty Serving Tray, XL, Empune |
|
| 9 | 3-Piece Set Bamboo Cutting Board for Kitchen - Crack-Resistant Wood Chopping Boards with Deep Juice Grooves, Pre-Oiled Butcher Block for Meat, Vegetables & Cheese, Carbonized |
|
| 10 | Keechee Bamboo Cutting Board, Durable Wood Cutting Boards for Kitchen with Deep Juice Grooves & Built-in Handles, Ideal Charcuterie & Chopping for Meat, Vegetables and Fruits Ideal Kitchen Gifts |
|
White water rings are common but often surprisingly simple to remove. These methods work by either drawing out the trapped moisture or gently abrading the affected finish.
Petroleum Jelly Method
This gentle method works wonders on fresh white rings.
- Apply: Dab a generous amount of petroleum jelly directly onto the white ring.
- Wait: Let it sit overnight, or even for up to 24 hours, to allow the jelly to penetrate and lift the moisture.
- Wipe: Wipe away the petroleum jelly with a clean, soft cloth. The stain should lift with it.
- Buff: Buff the area with a fresh cloth to restore the shine.
Toothpaste & Baking Soda Paste
The mild abrasives in non-gel toothpaste, combined with baking soda, can gently scrub away the stain.
- Mix: Combine equal parts non-gel white toothpaste and baking soda to form a thick paste.
- Apply: Rub the paste onto the white ring with a soft cloth, working with the grain of the wood.
- Rub Gently: Continue rubbing gently for a few minutes.
- Wipe & Dry: Wipe off the paste with a clean, damp cloth and immediately dry the area thoroughly. Repeat if necessary.
Salt & Water Paste
Similar to the toothpaste method, salt acts as a gentle abrasive.
- Mix: Create a paste by mixing a teaspoon of salt with a few drops of water.
- Apply & Rub: Gently rub the paste onto the stain in a circular motion with a soft cloth.
- Wipe: Wipe off the residue with a damp cloth and dry completely.
Mayonnaise / Car Wax
The oils and fats in mayonnaise can help displace the trapped moisture causing the white rings. Car wax can also be effective.
- Apply: Spread a thin layer of mayonnaise or car wax over the stain.
- Wait: Let it sit for several hours, or even overnight.
- Wipe & Buff: Wipe off the substance and buff the wood with a clean, soft cloth.
Eradicating Stubborn Heat Stains
Heat stains often look similar to water rings but are caused by high temperatures damaging the finish.
Iron & Cloth Method
This method uses gentle heat to potentially re-bond the finish, but caution is essential to avoid further damage.
- Prepare: Lay a clean, dry cotton cloth (like a t-shirt or pillowcase, no patterns) over the heat stain.
- Iron: Set your iron to a low, dry heat setting (no steam).
- Apply Heat: Briefly place the iron on the cloth directly over the stain for a few seconds. Do not hold it in place for too long.
- Check: Lift the iron and cloth to check the stain. Repeat in short bursts until the stain fades.
- Cool & Buff: Allow the wood to cool, then buff with a soft cloth.
“For delicate finishes, a gentle touch is key. Always start with the least aggressive method and work your way up.” – Maria Sanchez, Professional Furniture Restorer
Mayonnaise (Alternate for Heat Stains)
As with water rings, mayonnaise can sometimes draw out the discoloration caused by heat.
- Apply: Spread a thin layer of mayonnaise over the heat stain.
- Wait: Let it sit for several hours.
- Wipe & Buff: Wipe away and buff the area until the stain is gone.
Tackling Dark and Deep-Set Stains (Ink, Food, Grease)
These stains penetrate deeper into the wood or its finish, requiring more robust solutions.
White Vinegar & Baking Soda Paste (for general dark stains, including red wine)
This combination creates a gentle chemical reaction that can lift many organic stains.
- Mix: Combine equal parts white vinegar and baking soda to form a paste.
- Apply: Spread the paste over the dark stain.
- Wait: Let it sit for about 30 minutes.
- Scrub & Wipe: Gently scrub the spot with a soft-bristled brush, then wipe off the paste with a damp microfiber cloth.
- Dry: Ensure the area is thoroughly dry. Repeat if the stain persists.
Oxalic Acid (Bar Keepers Friend)
Oxalic acid is a common ingredient in wood bleaches and can be very effective against dark water stains, rust stains, and some ink stains.
- Mix: Create a slurry by mixing Bar Keepers Friend powder with a little water.
- Apply: Drip the slurry onto the offending stain.
- Wait: Let it sit for approximately one hour.
- Wipe & Rinse: Carefully wipe it off with a damp paper towel. Remember this product is an abrasive cleanser, so don’t be too aggressive. Rinse thoroughly to remove all residue and dry completely.
Hydrogen Peroxide
For stubborn dark spots, hydrogen peroxide can act as a mild bleaching agent.
- Soak: Saturate a clean cloth with 3% hydrogen peroxide.
- Apply: Lay the cloth over the stain.
- Wait: Let it sit for about 30 minutes, checking periodically.
- Wipe & Dry: Remove the cloth, wipe the area clean with a damp cloth, and dry thoroughly.
Dish Soap for Grease Stains
For greasy residues, a simple degreasing agent can be effective.
- Mix: Dilute a squirt of household dish detergent in a pail of warm water.
- Suds & Apply: Suds up a soft sponge or cloth with the solution and gently rub the greasy area.
- Wipe & Dry: Wipe clean with a damp cloth and dry immediately. For stubborn grease, add ¼ to ½ cup of white vinegar to the soapy water.
Advanced Stain Removal Techniques (For Tough Stains or Refinishing)
When household remedies aren’t enough, or if you’re looking to completely strip and refinish a piece of wood, more intensive methods are needed.
Chemical Wood Strippers
Chemical strippers are designed to loosen and remove existing finishes and deeply embedded stains. They come in different formulations:
- Solvent Strippers: Strong and fast-acting, ideal for oil-based stains and tough finishes. They produce strong fumes and are often flammable, requiring excellent ventilation and strict safety precautions (gloves, eye protection, respirator).
- Caustic Strippers: Water-based and generally easier to work with, suitable for various stain types. They work by loosening the finish.
- Biochemical Strippers: Plant-based (e.g., citrus or soy), these are safer with fewer fumes but can take longer to work (up to 24 hours). They are effective on oil- and water-based stains but may not work on epoxy or polyurethane.
Application Steps (General):
- Prepare Work Area: Work outdoors or in a very well-ventilated space. Lay down drop cloths. Remove hardware if possible.
- Apply Stripper: Pour the stripper into a glass or metal container. Apply a thick, even layer with a natural fiber paintbrush, working in small sections (e.g., one square foot at a time) to prevent it from drying.
- Wait: Allow the stripper to sit for the manufacturer’s recommended time (typically 15-20 minutes, or longer for biochemical types). The finish will usually bubble or swell.
- Remove Stain: Gently scrape off the loosened stain and stripper residue with a plastic scraper or putty knife, always working with the wood grain. Dispose of residue properly.
- Clean Up: Follow the stripper’s instructions for residue removal (e.g., mineral spirits for some, water for others). Wipe clean with a tack cloth.
- Neutralize (if required): Some strippers require a neutralizer. Follow product instructions carefully.
Sanding and Bleaching
For stains that have deeply penetrated the wood and cannot be chemically removed, sanding or bleaching might be the last resort.
-
Sanding: This process removes the thin layer of wood that has absorbed the stain.
- Dry & Prep: Ensure the wood is completely dry. Clean the surface.
- Start Coarse: Begin with a medium-grit sandpaper (e.g., 100-150 grit) using a sanding block or orbital sander. Apply light pressure and sand with the grain.
- Progress to Finer Grits: Once the stain is removed, switch to progressively finer grits (e.g., 180, then 220) to smooth the surface.
- Clean Dust: Wipe away all sawdust with a tack cloth.
- Caution: Sanding removes material, so be mindful of the thickness of your wood, especially with veneers. Wear a mask to avoid inhaling wood dust.
-
Wood Bleach: For very dark stains that persist after other methods, wood bleach can lighten the wood itself.
- Types: Oxalic acid is effective for dark water and rust stains. Two-part wood bleaches (Part A and Part B) are stronger and can lighten the natural color of wood.
- Apply: Follow manufacturer instructions precisely. Apply with a paintbrush or old toothbrush, focusing only on the stained area or the entire piece if uniform lightening is desired.
- Wait & Rinse: Allow it to work, then neutralize (if a two-part bleach) and rinse thoroughly.
- Dry & Sand: Let the wood dry completely, then lightly sand to smooth any raised grain.
- Caution: Wood bleach is corrosive; wear appropriate PPE. It can lighten wood unevenly if not applied carefully.
Post-Removal Care and Prevention
Once your wood is stain-free, proper aftercare and prevention are vital to maintain its beauty.
Cleaning the Surface Thoroughly
After any stain removal process, particularly with chemicals, it’s critical to clean the wood thoroughly.
- Wipe down the entire area with a clean, damp cloth to remove any lingering residue from cleaning agents.
- Allow the wood to dry completely, ideally for 24 hours, before proceeding with any finishing steps.
Re-oiling, Polishing, and Finishing
Stain removal can strip the wood of its protective finish.
- Condition: Apply a wood conditioner or mineral oil (especially for butcher blocks and cutting boards) to replenish moisture and prevent cracking.
- Polish: Use a quality furniture polish to restore shine and provide a protective layer.
- Re-seal/Re-finish: For extensive stripping or sanding, you will need to re-apply a new stain and protective topcoat (e.g., polyurethane, varnish) to seal the wood and protect it from future damage.
Prevention Tips
The best defense against stains is prevention.
- Coasters and Trivets: Always use coasters under glasses and hot pads or trivets under hot dishes.
- Immediate Cleanup: Wipe up spills immediately. Don’t let liquids sit on wood surfaces.
- Regular Cleaning: Dust and clean wood surfaces regularly with appropriate wood cleaners.
- Maintain Finish: Keep your wood furniture well-maintained with regular polishing or oiling to ensure its protective finish is intact.
- Humidify: In dry environments, use a humidifier to prevent wood from drying out and cracking, which can make it more susceptible to stains.
Expert Tips for Flawless Wood Restoration
- Always Test First: Before applying any solution to a prominent area, test it on an inconspicuous spot (like the underside of a table or inside a cabinet door) to ensure it doesn’t damage the finish or discolor the wood.
- Work with the Grain: When rubbing, scrubbing, or sanding, always move in the direction of the wood grain. This minimizes scratches and helps the treatment penetrate evenly.
- Know Your Wood Type and Finish: Different woods (hardwood vs. softwood) and finishes (varnish, lacquer, oil) react differently. Research your specific piece if unsure.
- Patience is a Virtue: Some stains require multiple applications or longer waiting times. Don’t rush the process; aggressive scrubbing can do more harm than good.
- When to Call a Professional: If the stain is exceptionally large, deep, or on a valuable antique, or if you’re uncomfortable using strong chemicals, it’s always best to consult a professional furniture restorer. Their expertise can save your piece from irreversible damage.
Conclusion
Dealing with wood stains can be daunting, but with this comprehensive cleaning guide, you are now equipped with a powerful arsenal of techniques to tackle almost any blemish. From simple household remedies for white water rings to advanced stripping and sanding methods for deeply embedded marks, the key lies in understanding the stain, choosing the right approach, and exercising patience. Regular maintenance and preventative measures are your best allies in keeping your wooden treasures looking their best. By following these steps, you not only remove a stain but also deepen your connection to the beauty and resilience of wood itself.
What’s the most challenging wood stain you’ve ever faced, and how did you conquer it?
Frequently Asked Questions
Can all wood stains be removed?
While most common stains can be significantly reduced or completely removed with the right techniques, some very old, deep, or chemically-induced stains might be permanent. However, persistent effort often yields surprising results.
Is it safe to use bleach on wood?
Bleach, particularly oxalic acid or two-part wood bleaches, can be safe and effective for lightening certain dark stains on wood when used correctly. However, it’s crucial to follow manufacturer instructions, wear protective gear, and test on an inconspicuous area first, as it can potentially alter the wood’s natural color or damage the finish if misused.
How often should I clean my wood furniture?
General cleaning, like dusting, should be done weekly. Deeper cleaning to remove grime or minor marks can be done monthly or quarterly, depending on usage. More intensive stain removal is performed as needed, but regular maintenance helps prevent severe staining.
What’s the difference between wood stain removal and wood stripping?
Wood stain removal typically focuses on lifting or lightening specific discolorations on the surface or within the wood’s finish. Wood stripping, on the other hand, involves chemically or mechanically removing the entire existing finish (e.g., varnish, paint, or old stain) to prepare the wood for a new finish.
When should I hire a professional for wood stain removal?
Consider hiring a professional if the stain is extensive, very deep, covers a large area, or is on a valuable antique. Professionals have specialized tools, chemicals, and expertise to safely and effectively restore wood without causing further damage.