Stepping into the world of woodworking, few projects offer the blend of practicality, beauty, and skill development quite like building an end grain cutting board. Imagine a centerpiece for your kitchen, meticulously crafted by your own hands, that not only stands as a testament to your dedication but also provides a superior cutting surface for years to come. This comprehensive guide will take you through every essential step of making your own end grain cutting board, from selecting the perfect lumber to the final oiling, ensuring you create a durable, knife-friendly, and stunning piece that will be the envy of every home cook.
Understanding End Grain Cutting Boards
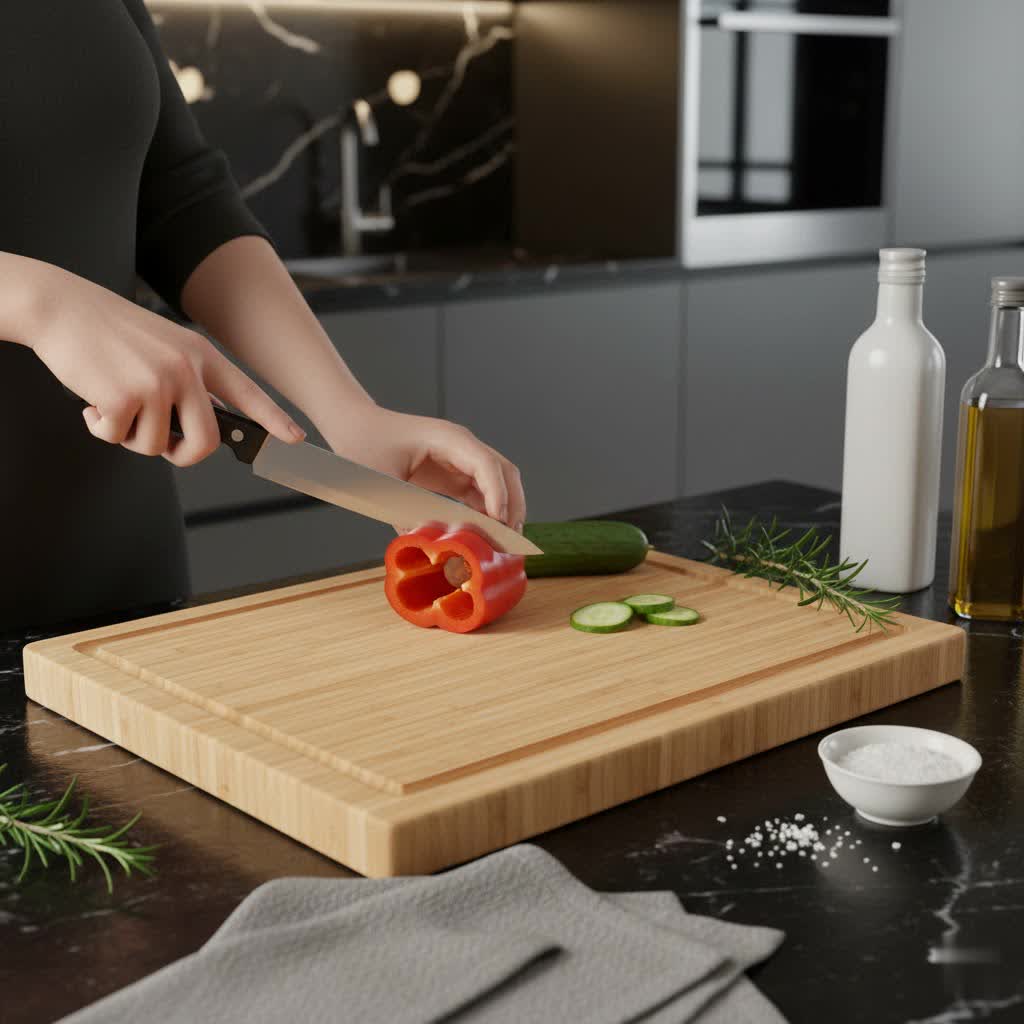
An end grain cutting board is a premium kitchen tool revered by chefs and home cooks alike. Unlike face grain or edge grain boards, which expose the long, flat sides of the wood fibers, an end grain board features the ends of the wood fibers as its cutting surface. This unique orientation creates a “self-healing” effect: when a knife blade strikes the surface, it slides between the wood fibers rather than cutting across them. This action not only keeps your knives sharper for longer but also reduces visible cut marks on the board, enhancing its longevity and aesthetic appeal.
The construction of an end grain board typically involves gluing together numerous small blocks of wood, often creating intricate, beautiful patterns such as checkerboards or geometric designs. This complex assembly results in a significantly more durable and stable board, less prone to warping or cracking than its face or edge grain counterparts. Beyond their practical benefits, end grain boards offer a distinctive visual texture that brings warmth and elegance to any kitchen.
Essential Tools and Materials
Crafting an end grain cutting board requires a combination of common woodworking tools and specific materials to ensure a high-quality, food-safe product.
Wood Selection
Choosing the right wood is paramount for an end grain cutting board. You need hardwoods with a closed, tight grain structure that are durable, food-safe, and won’t dull your knives excessively. The ideal Janka hardness rating for cutting boards typically falls between 900 and 1500 pounds-force.
- Hard Maple (Sugar Maple): Often considered the gold standard, Hard Maple boasts a Janka rating around 1450. Its dense, closed grain makes it incredibly durable, highly resistant to bacteria absorption, and gentle on knife edges. Its light, neutral color also highlights food preparation and provides a clean aesthetic.
- Walnut (Black Walnut): With a Janka rating of approximately 1010, Walnut is another excellent choice. It’s slightly softer than maple, making it even kinder to knives, and its rich, dark brown tones add a sophisticated touch to your kitchen. Walnut is also known for its good stability.
- Cherry (Black Cherry): Cherry, with a Janka rating around 950, offers a beautiful reddish-brown hue that deepens with age. It’s a bit softer than walnut, providing an exceptionally knife-friendly surface, and its fine grain contributes to a smooth finish.
|
Our Picks for the Best Wooden cutting board in 2026
As an Amazon Associate I earn from qualifying purchases.
|
||
| Num | Product | Action |
|---|---|---|
| 1 | Extra Large Cutting Board, 17.6" Bamboo Cutting Boards for Kitchen with Juice Groove and Handles Kitchen Chopping Board for Meat Cheese board Heavy Duty Serving Tray, XL, Empune |

|
| 2 | Allsum Bamboo Wood Cutting Board for Kitchen, 1" Thick Butcher Block, Cheese Charcuterie Board, with Side Handles and Juice Grooves, 16x11" |
|
| 3 | Greener Chef Luxury XL Bamboo Cutting Board Set of 3 with Vertical Grain Strength Technology - Extra Large Wood Cutting Boards for Kitchen and Lightweight Chopping Board Set - Replacements for Life |
|
| 4 | 3-Piece Set Bamboo Cutting Board for Kitchen - Crack-Resistant Wood Chopping Boards with Deep Juice Grooves, Pre-Oiled Butcher Block for Meat, Vegetables & Cheese, Carbonized |
|
| 5 | Freshware Bamboo Cutting Board Set of 3, Wooden Cutting Boards for Kitchen, Knife Friendly Food Grade Chopping Board, Lightweight with Hanging Hole for Easy Storage |
|
| 6 | Astercook Deep-Carbonized Bamboo Cutting Boards for Kitchen with Wood Storage Stand, Reversible Charcuterie & Chopping Boards with Juice Grooves and Easy-Grip Handles, Knife-Friendly, Kitchen Gift |
|
| 7 | Kikcoin 17”×11” Bamboo Cutting Boards for Kitchen, Healthy Wooden Cutting Boards for Kitchen, Charcuterie, Vegetables, Cheese, Extra Large Chopping Boards with Deep Juice Groove and Handle, Natural |
|
| 8 | Premium Cutting Board Set – Non-Toxic Carbonized Bamboo & Wooden Cutting Boards for Kitchen Meal Prep, Durable Butcher Block for Meat with Side Handles, Juice Groove, Charcuterie & Chopping (3 Pcs) |
|
| 9 | Bamboo Cutting Board for Kitchen, 18" Large Wood Charcuterie Cheese Board, Wooden Chopping Block with Side Handles and Juice Grooves |
|
| 10 | Keechee Bamboo Cutting Board, Durable Wood Cutting Boards for Kitchen with Deep Juice Grooves & Built-in Handles, Ideal Charcuterie & Chopping for Meat, Vegetables and Fruits Ideal Kitchen Gifts |
|
Avoid softwoods like pine or cedar, and open-grain hardwoods such as oak, as they can harbor bacteria and are prone to excessive knife marks. Woods like teak and acacia, while attractive, contain silica which can rapidly dull your knife blades.
Adhesives
For a cutting board that will endure frequent washing and exposure to moisture, a waterproof, food-safe wood glue is non-negotiable. Titebond III Ultimate Wood Glue is widely recommended for its superior water resistance and FDA approval for indirect food contact.
Key Tools
- Table Saw: Essential for ripping lumber into precise strips and crosscutting the glued panels. A good crosscut sled is highly recommended for accuracy and safety.
- Jointer and Planer: Critical for milling lumber to exact dimensions and ensuring perfectly flat surfaces for strong glue joints. If you don’t have these, you may need to purchase pre-milled lumber or seek a local millwork shop.
- Clamps: A variety of clamps, especially parallel clamps or pipe clamps, are crucial for applying even pressure during glue-ups and keeping pieces flat and aligned.
- Orbital Sander or Drum Sander: For flattening and smoothing the end grain surface. Crucially, never run an end grain board through a thickness planer, as it can cause dangerous blowout.
- Router (Optional): Useful for adding decorative edges, juice grooves, or handle recesses.
- Safety Gear: Always wear eye protection and hearing protection when operating power tools.
Step-by-Step Guide to Crafting Your End Grain Cutting Board
Making an end grain cutting board is a rewarding process that typically involves two major glue-ups. Precision at each stage is key to a beautiful and durable final product.
Design and Lumber Preparation
Before making any cuts, decide on the desired dimensions of your finished board and create a design. This will help you calculate the number and size of wood strips needed. Consider the thickness you want; end grain boards are often 1.5 to 2.5 inches thick.
Next, mill your chosen lumber to a consistent thickness and ensure all faces are perfectly flat and square. This step is critical for strong, gap-free glue joints. Use a jointer to flatten one face and one edge, then a planer to bring the boards to your desired thickness. Finally, use the table saw to square the remaining edge. Once milled, rip the boards into strips of your chosen width for the first glue-up. These strips will form the “face grain blank.” For example, if you want a 2-inch thick board, your strips might be 1.5 inches wide and 2 inches tall (when on their side).
The First Glue-Up
This stage involves gluing the face grain strips together to create a solid panel.
- Arrange the Strips: Lay out your ripped strips on your clamps in the desired pattern. Ensure all pieces are oriented correctly and that the edges to be glued are clean.
- Apply Glue: Liberally apply Titebond III to one face of each strip before joining them. Use a glue roller or brush to ensure even coverage from end to end.
- Clamp Tightly: Arrange the glue-covered strips on your clamps. Use parallel or pipe clamps to apply even pressure, both from the sides and, if possible, from the top and bottom (using cauls) to prevent bowing. Tighten slowly, ensuring alignment. Wipe off any excess glue squeeze-out with a damp rag before it dries.
- Dry: Allow the glue to cure completely, typically 12-24 hours, following the glue manufacturer’s recommendations.
Flattening and Crosscutting
Once the first glue-up is dry, remove the clamps. The panel will likely have some residual glue and unevenness.
- Flatten the First Glue-Up: Run the panel through your thickness planer until both faces are flat and smooth. Aim for a consistent thickness.
- Crosscut into End Grain Strips: This is where the magic happens. Using a table saw with a crosscut sled and a sharp, high-tooth-count blade (for cleaner cuts and less tear-out), cut the large face grain panel into smaller strips. The width of these new strips will become the thickness of your final end grain cutting board. For example, if your first glue-up was 1.5 inches thick and you want a 2-inch thick end grain board, you’ll crosscut strips that are slightly over 2 inches wide to allow for final sanding. These cuts expose the end grain, revealing the intricate patterns that will define your board.
The Second Glue-Up
This is the most visually impactful glue-up, where the end grain sections are joined to form the final board.
- Arrange for Pattern: Carefully arrange the newly cut end grain strips on your clamps. Experiment with flipping and rotating the strips to create appealing patterns. This is often where a “checkerboard” or “brick” pattern emerges.
- Apply Glue: Apply Titebond III to the long grain faces of these end grain strips. Again, ensure even coverage.
- Clamp for Flatness: This second glue-up is critical for maintaining flatness. Use plenty of clamps and cauls to ensure the strips remain perfectly aligned and flat as pressure is applied. Any shifting here will result in unevenness that is challenging to correct later. Tighten slowly and clean up glue squeeze-out.
- Dry: Allow the glue to fully cure, typically for 24 hours or more.
Final Shaping and Sanding
With the second glue-up complete, your board is taking its final form.
- Flatten the Second Glue-Up (Sanding): As mentioned, do not use a planer on end grain. Instead, use a drum sander (if available) or an orbital sander. Start with a coarse grit sandpaper (e.g., 60 or 80 grit) to remove any major inconsistencies and glue residue. Use the “pencil trick” by marking the entire surface with pencil lines; sand until all lines are gone, indicating a flat surface. Progress through finer grits (100, 150, 220).
- Raise the Grain (Important): After sanding to 220 grit, lightly mist both sides of the board with water. This causes the wood fibers to swell and stand up. Let it dry completely, then sand again with 220 grit. Repeat this process once or twice. This prevents the board from feeling rough after its first few washes.
- Trim Edges and Rout (Optional): Use your table saw with a crosscut sled to trim the ends and sides, ensuring all edges are perfectly square and clean. If desired, use a router with a roundover bit to ease the sharp edges or a core box bit to create finger holds or a juice groove. Finish sand these routed areas by hand.
Finishing Your End Grain Cutting Board
The finish not only enhances the beauty of your cutting board but also protects the wood and makes it food-safe.
- Mineral Oil Application: The most popular and recommended finish is food-grade mineral oil. It’s non-toxic, doesn’t go rancid, and penetrates deep into the wood fibers, conditioning them from within. Liberally apply mineral oil to all surfaces of the board. Allow it to soak in for several hours or overnight. The end grain will absorb a lot, especially on the first application.
- Repeat Oiling: Reapply mineral oil several times, wiping off any excess after each application, until the wood no longer readily absorbs it.
- Mineral Oil and Beeswax Blend: For added protection and a smoother, more lustrous finish, apply a blend of food-grade mineral oil and beeswax (often called “board butter” or “cutting board conditioner”). This mixture provides a thin, protective layer that helps seal the wood and repel moisture. Apply a generous amount, let it sit for 30 minutes to an hour, then buff off the excess with a clean, lint-free cloth.
“A well-oiled end grain cutting board isn’t just a kitchen tool; it’s a piece of functional art, designed to protect both your knives and your countertops for generations.” – Admin, Reviewerix.com
Care and Maintenance for Longevity
Proper care is essential to ensure your handcrafted end grain cutting board remains beautiful and hygienic for many years.
- Hand Wash Only: Never put your wooden cutting board in a dishwasher. The high heat and harsh detergents will cause the wood to warp, crack, and dry out.
- Gentle Cleaning: After each use, wash your board with warm water and a mild dish soap. Use a soft sponge or cloth to clean the surface.
- Avoid Soaking: Do not submerge or soak your cutting board in water for extended periods. This can lead to warping and cracking.
- Dry Thoroughly: Immediately after washing, dry the board completely with a clean towel. Allow it to air dry fully by standing it on its edge to promote even airflow around all surfaces.
- Regular Oiling: Reapply food-grade mineral oil every few weeks, or whenever the wood appears dry or water no longer beads on the surface. For best results, follow up with a mineral oil and beeswax conditioner.
- Proper Storage: Store your board on its edge rather than flat on a countertop to allow for even air circulation and prevent moisture accumulation on one side.
Comparative Overview: Ideal Woods for End Grain Cutting Boards
| Wood Type | Janka Hardness (lbf) | Knife-Friendliness | Durability | Aesthetic Appeal | Maintenance Needs |
|---|---|---|---|---|---|
| Hard Maple | ~1450 | Excellent | Very High | Light, clean, consistent, versatile | Regular oiling |
| Walnut | ~1010 | Excellent | High | Rich, dark brown tones, elegant, distinctive | Regular oiling |
| Cherry | ~950 | Excellent | Good to High | Reddish-brown, deepens with age, fine grain | Regular oiling |
Conclusion
Crafting your own end grain cutting board is a fulfilling project that blends woodworking skill with practical kitchen utility. By carefully selecting your wood, executing precise glue-ups, diligently sanding, and properly finishing your board, you create a durable, knife-friendly masterpiece that will be cherished for years. This process not only equips you with a superior cutting surface but also deepens your understanding and appreciation for fine woodworking.
Are you ready to elevate your kitchen and woodworking skills by making your own end grain cutting board?
Frequently Asked Questions
What makes an end grain cutting board better than other types?
End grain cutting boards are superior because their vertical wood fibers act like a self-healing surface. Knife blades slide between the fibers, preserving the sharpness of your knives and minimizing visible cut marks on the board itself, leading to greater durability and hygiene.
Can I use any type of wood for an end grain cutting board?
No, it’s crucial to use dense, closed-grain hardwoods like maple, walnut, or cherry. Softwoods or woods with open grain can harbor bacteria and show knife marks easily, while woods containing high silica (like teak) can dull knives quickly.
Why shouldn’t I put an end grain cutting board in the dishwasher?
Dishwashers expose wooden cutting boards to extreme heat and prolonged moisture, which can cause the wood to warp, crack, and lose its natural oils. Always hand wash your end grain cutting board with mild soap and warm water, and dry it immediately.